Image-to-video prompt guide

Image-to-video prompts: 12 examples for better motion

The image establishes the shot. Your prompt explains what moves next. Start with one action, add a camera instruction when it matters, and adapt these examples to the subject and composition already in your image.

Maintained by the FrameCompose product team · Last reviewed 22 September 2026

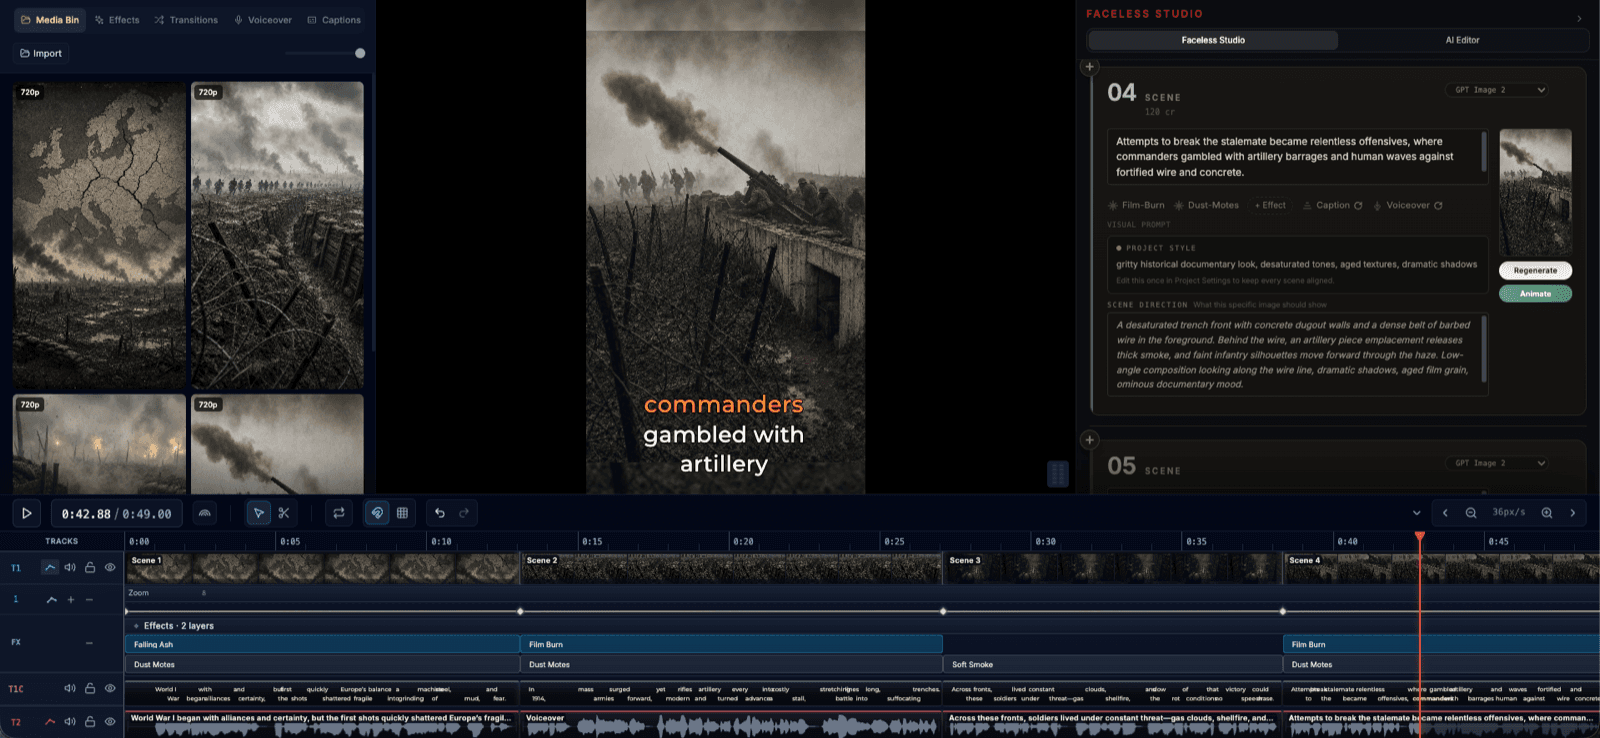
FrameCompose scene cards with editable prompts beside the video preview and timeline
Plan and review motion scene by scene, then finish the clips on the timeline.

Describe subject movement instead of repeating the image description.

Use one main action and a deliberate camera choice per short clip.

Match the prompt to the people, props, and space visible in the image.

Change one instruction at a time when a generated movement misses.

A practical image-to-video prompt formula

Write the subject’s action first, then the camera movement, then any small environmental motion that supports the shot. For example: “She turns towards the window. The camera slowly moves closer. The curtain moves gently in the breeze.” You do not need all three parts for every clip.

Runway’s official image-to-video guidance treats the input image as the source of composition and appearance and recommends focusing the text on motion. Google’s Veo guide also distinguishes subject action from camera movement. The examples here follow that approach; they are original starting prompts, not a claim of identical or tested results across models.

Begin with a clear image and a short, achievable action. If the prop is absent or the face is malformed in the source, repair the image first. Model support, available controls, and the length of the clip affect what a prompt can achieve.

Examples 1–3: reactions and character movement

Use small actions when the expression is the point of the shot. A turn of the head or a pause before a smile often gives a story enough movement without needing a second event. Keep the face visible and leave room in the source image for the intended movement.

1. A quiet realisation

Start with a clear medium close-up. Useful when a character notices a clue.

She shifts her gaze towards the object beside her, pauses, and raises her eyebrows slightly. The camera remains still. Her shoulders stay relaxed.

2. A relieved reaction

Use a face that is already readable; the change in expression carries the shot.

He lets out a gentle breath, lowers his shoulders, and gives a small relieved smile. The camera moves slowly closer throughout the shot.

3. A short walk into the scene

Start with a full-body view and open space in the direction of travel.

The character takes two unhurried steps towards the doorway and stops beside it. The camera tracks gently alongside at the same pace, keeping the character in frame.

Examples 4–6: objects, hands, and deliberate actions

Make the required object visible in the starting frame. Keep hand interactions simple, then inspect fingers, grip, and object shape across the whole clip. If a complex action repeatedly fails, show its setup and result in separate shots.

4. Pick up a clue

The clue and the character’s hand should both be visible and close together.

She reaches for the folded note, lifts it from the table, and holds it still in front of her. The camera stays fixed on her hand and the note.

5. Open a door for a reveal

Use an image with the character beside a visible door handle. Keep the reveal simple.

He gently turns the handle and opens the door a little. Warm light spills through the widening gap. The camera remains still behind his shoulder.

6. Water the miniature forest

For the story example: start with the can tipped above the forest and a clear path for the water.

A thin stream of water pours from the green watering can onto the tiny trees. Droplets settle on the leaves. The hand holds the can steadily as the camera stays close to the action.

Examples 7–9: camera movements and reveals

A camera move changes what the viewer notices. Move closer to emphasise a clue, sideways to reveal something behind an obstruction, or backwards to show a wider consequence. Large moves may require the model to invent parts of the scene beyond the original image.

7. Move closer to a clue

The object should already be sharp enough to matter. Do not rely on generated text becoming legible.

The camera slowly moves closer to the small brass key on the desk, keeping the key at the centre of the frame. The surrounding objects remain still.

8. Reveal something behind a foreground object

Choose a composition with a clear foreground edge and a partly visible subject behind it.

The camera slides slowly to the right past the foreground pillar, revealing the character waiting beside the vending machine. The character stays still as the camera completes the reveal.

9. Pull back for the ending

Start with some of the environment visible; a modest pullback is easier to assess than a huge aerial move.

The camera slowly pulls back from Mara to reveal the station platform filled with green plants. She remains beside the vending machine, holding her watering can as the leaves move gently.

Examples 10–12: atmosphere and product shots

Not every clip needs a person to move. Environmental motion can hold an establishing shot, while a controlled camera move can give a product still a little depth. Keep readable logos, labels, and important product geometry under close review.

10. Rain outside a quiet room

Use an image with a visible window. Keep the room still so the motion has one clear focus.

Rain droplets move slowly down the window. The curtain sways lightly beside it. The camera remains fixed, and the room stays still.

11. A gentle landscape shot

Start with distinct foreground and background elements to make the movement readable.

Foreground grasses sway in a light breeze while ripples cross the lake. The camera pans slowly to the right along the shoreline.

12. A restrained product reveal

Use an accurate, owned product image. Reject output that changes its shape, label, or branding.

The camera makes a small, slow arc around the bottle, keeping it centred and fully visible. A soft reflection moves across the glass. The bottle remains upright and still on the surface.

How to fix a motion prompt that misses

If nothing moves, name a visible subject and give it a concrete verb. Replace “make it cinematic” with “the camera moves slowly closer as she turns towards the window.” If too much moves, remove secondary actions and choose a fixed camera.

If the face or object changes, check the starting image, reduce the range of movement, and inspect the full result. If the action runs out of time, split it into clips. If a requested camera move reveals a strange background, try a smaller move that stays closer to the source composition.

Change one part of the prompt at a time so you can tell which instruction helped. In FrameCompose, review the scene’s animation direction, generate the selected scene, and compare it with its neighbours on the timeline. Keep the accepted shots and repair the one that missed.

Frequently asked questions

A few quick answers before you jump in.

What should I put in an image-to-video prompt?

Describe what should move: the subject’s action, the camera movement, and any relevant environmental change. The source image already supplies much of the appearance and composition. Start with a short, clear action and add detail only where it helps.

Should I describe the whole image again?

Usually the motion instruction is more useful than repeating everything visible. Identify the subject clearly when several people or objects appear, then explain what they do. Follow the selected model’s guidance for any additional constraints.

Do these prompts work with every AI video model?

They are starting points for expressing motion, not a guarantee across models. Available controls, prompt interpretation, reference support, and duration vary. Adapt the example to your image and the model you select.

How long should a motion prompt be?

Use enough words to make one action and the camera choice clear. One to three direct sentences is a useful starting point for a short clip. Split complex sequences instead of adding many competing instructions.

Can I use image-to-video prompts to build a whole story?

Yes. Plan the story first, make a suitable image for each shot, and give each clip its own motion direction. Assemble the accepted clips with narration and captions, then review continuity and pacing before export.

Related pages

Explore the rest of the workflow, from first idea to final export.